
How To Build A 2.5′ Tall Ferris Wheel In Nine Steps

January 31, 2018
Have you ever been to the fair and watched as the rides move? Do you wonder how the rides work or what makes them work? I know that when I am at the fair, I always watch to see how the various rides move like they do. Are you that person that is interested in building things of your own? Knex are a great way to do different engineering activities. If you are that person that wonders how things work, you can build a model of it out of Knex and see it in action. I really enjoy experimenting with these and it is really fun. I hope that if you are building it, then you will enjoy the entire process.
First, you probably need to know the pieces you need. You are going to need lots of Knex pieces. Here are the pieces you will need;
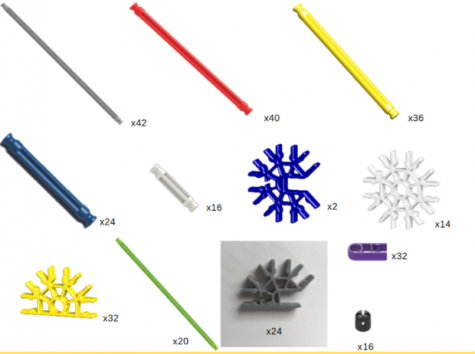
*Note*
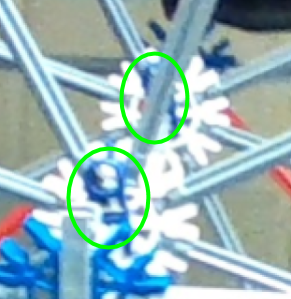
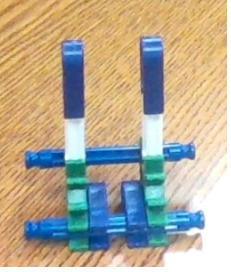
The gray and blue pieces with little notches in them slide together. (Image Below):
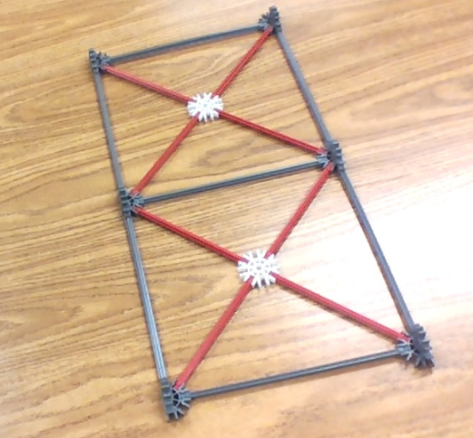
Step 1- Building The Base:
First you build the base. You get 7 of the long gray poles and 12 of the gray pieces with the notches. Put them together by the notches (image above). Put these pieces together so they make a rectangle. Also, get two of the white circles and put 4 red pieces in it skipping every other space. Now, you should have an x shape and you connect it to the gray corners. It should look like this:
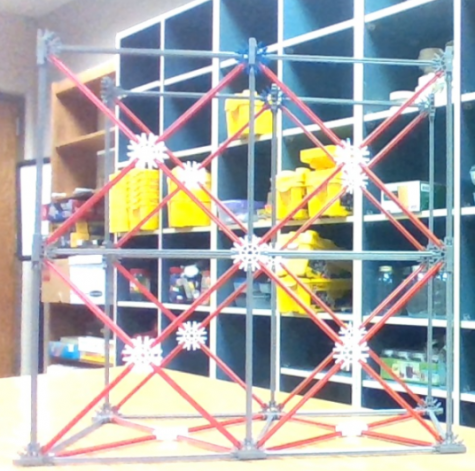
Step 2-Building The Walls:
Now, get 3 of the gray poles and put them in the gray connector pieces (the ones from the base) so that they are standing up. After that, get four of the gray connector pieces and put each in a pair so that you have them connected. Put them on the two corner pieces. Get 1 white circle and put it on top of the middle pole. Get 2 more of the gray poles and connect the gray corner pieces to the white circle. Make another x shape with 4 red poles and one white circle and put it in the middle square. Do that on both sides. Now, repeat those steps so you have another rectangle on top of the bottom rectangle. Wait! Make sure that on top of the middle pole, do not put a white circle on it. Get one of the blue circles with a notch and a gray one with a notch and put them together.
It should look like this now:
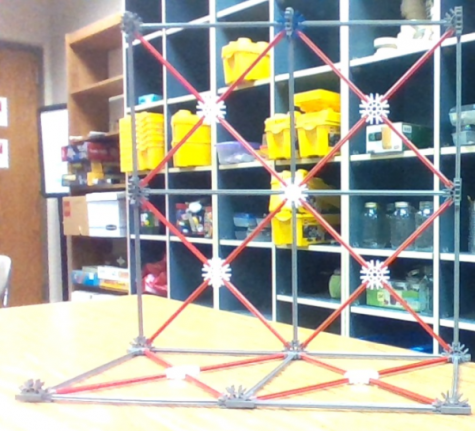
Repeat step 2 on the others side of the wall so you will now have two walls. It will look like this now:
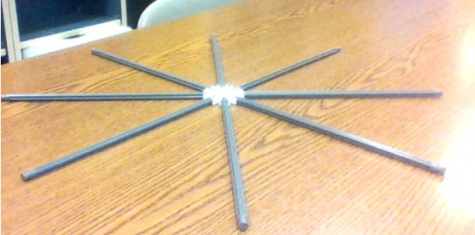
Step 3-The Spokes:
Now get one of the white circles and put 8 of the long gray poles on it so that it looks like this;
Repeat this step with the other white circle and gray poles. Put a gray pole on the middle connector pieces at the top and put the two wheels on the pole. It should now look like this;
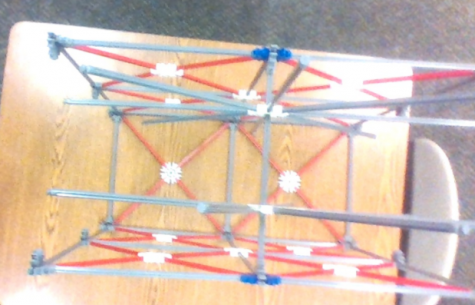
(Above View)
Step 4-Adding On To The Spokes:
Now put all the yellow poles and the yellow semi-circles in a pile. Get four of the yellow poles and four of the semi circles. Put them together so it forms a square like this;
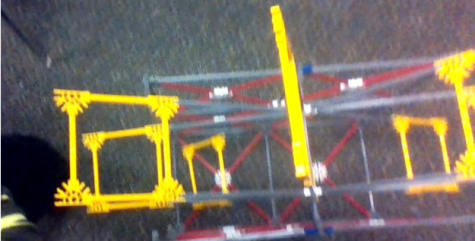
(Above View)
Step 5-Securing The Wheel:
Now, get four of the purple pieces and put two of them on each side of the left white circle. Repeat this step for the white circle on the right too. It should look like this;
Step 6-Creating The Rim:
Now for this part, you will need all of the light green poles and all of the straight-orange pieces. You will also need two of the green connector pieces. Put six of the green poles together connecting them by the orange pieces. Now, put one of the green connectors on both ends of the rim. Now, get four more of the light green poles and connect them by the orange pieces. Now connect both ends to the green connectors and you will have a circle. The rim should look like this:
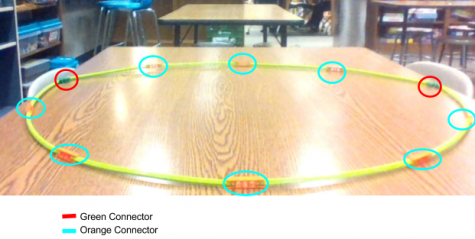
Repeat this step again to make another rim using the rest of the light green poles, the orange connectors, and the two green connectors.
Step 7-Putting The Rim On The Wheel:
Now, use the top of the yellow semi-circles to connect the wheel and the rim together. The rim should now be attached to the spokes (wheel). Do this on both sides of the wheel. Make sure that the green connectors are across from each other and that the orange connectors are across from each other. The orange connectors should be facing so that the hole in the middle is facing towards you, not up or down. Here is what it should look like:
Step 8- Making The Seats:
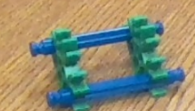
The remaining pieces are for the seats. First, get two of the green connectors and put a blue piece through the top and bottom of them. The seat will now look like this:
Now, put two of the purple pieces on the top part of the green connectors. Once those are attached, put a purple piece on top of each of the white poles. After this, get two more purple pieces and put them on the bottom blue pole. It should look like this now:
Keep making seats (all the same) until all the pieces are used and you have eight seats.
Step 9-Attaching the seats to the wheel:
Undo one side of one of the yellow poles at the top. Put the pole through the top purple pieces on the wheel and put the yellow piece back on. Repeat this step until all the seats are attached to the wheel. Make sure that all the seats are facing the same direction.
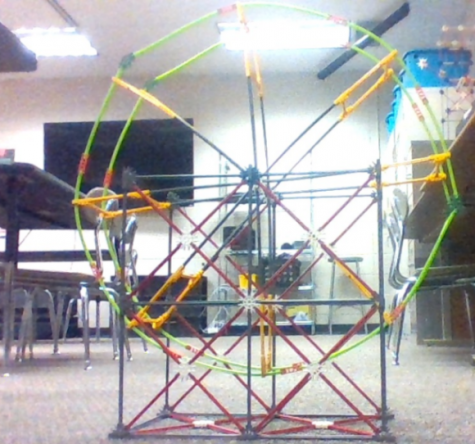
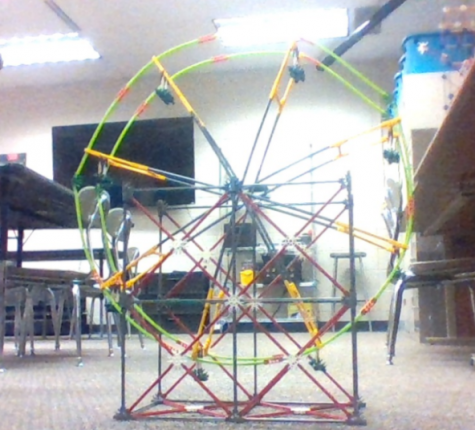
The final picture of the ferris wheel should look like this:
I hope you enjoy this gigantic ferris wheel but most of all, I hope you had fun in the process of building it. Now all that is left to do is give it a spin and watch as it spins like a real life ferris wheel. If you would like some more Knex ideas then visit their website at www.knex.com. Keep having fun and doing different engineering ideas while you build with Knex.